A complete guide to installing Diamond Car Wraps
Diamond car wraps are a fantastic way to give your vehicle a luxurious and eye-catching appearance. With their sparkling finish and sleek design, they can completely transform the look of your car. While professional installation is always an option, many car enthusiasts prefer to take on the task themselves. If you're ready to tackle this project, here's a step-by-step guide to installing Diamond Car Wraps.
Step 1: Gather Your Tools and Materials
Before starting, make sure you have all the necessary tools and materials. You'll need:
- Diamond car wrap film
- A heat gun or hairdryer
- Squeegee or application tool
- Utility knife or precision blade
- Microfiber cloth
- Isopropyl alcohol
- Measuring tape
- Gloves
Having everything prepared will make the process smoother and more efficient.
Step 2: Clean and Prepare the Surface
A clean surface is crucial for a flawless wrap application. Wash your car thoroughly with soap and water, then dry it completely. Use isopropyl alcohol and a microfiber cloth to remove any remaining grease, dirt, or debris. Pay special attention to edges, crevices, and hard-to-reach areas, as any imperfections can affect the wrap's adhesion.
Step 3: Measure and Cut the Wrap
Measure the sections of your car you plan to wrap. Add a few extra inches to your measurements to allow for adjustments during application. Cut the diamond wrap film into manageable pieces for each section, such as doors, hood, roof, or bumpers.
Step 4: Position the Wrap
Peel off the backing from the wrap film and position it on the desired section of your car. Start at one edge and work your way across, ensuring the wrap is aligned properly. Use a squeegee to press the film onto the surface gently. Avoid stretching or pulling the wrap too much, as this can distort the diamond pattern.
Step 5: Smooth Out Air Bubbles
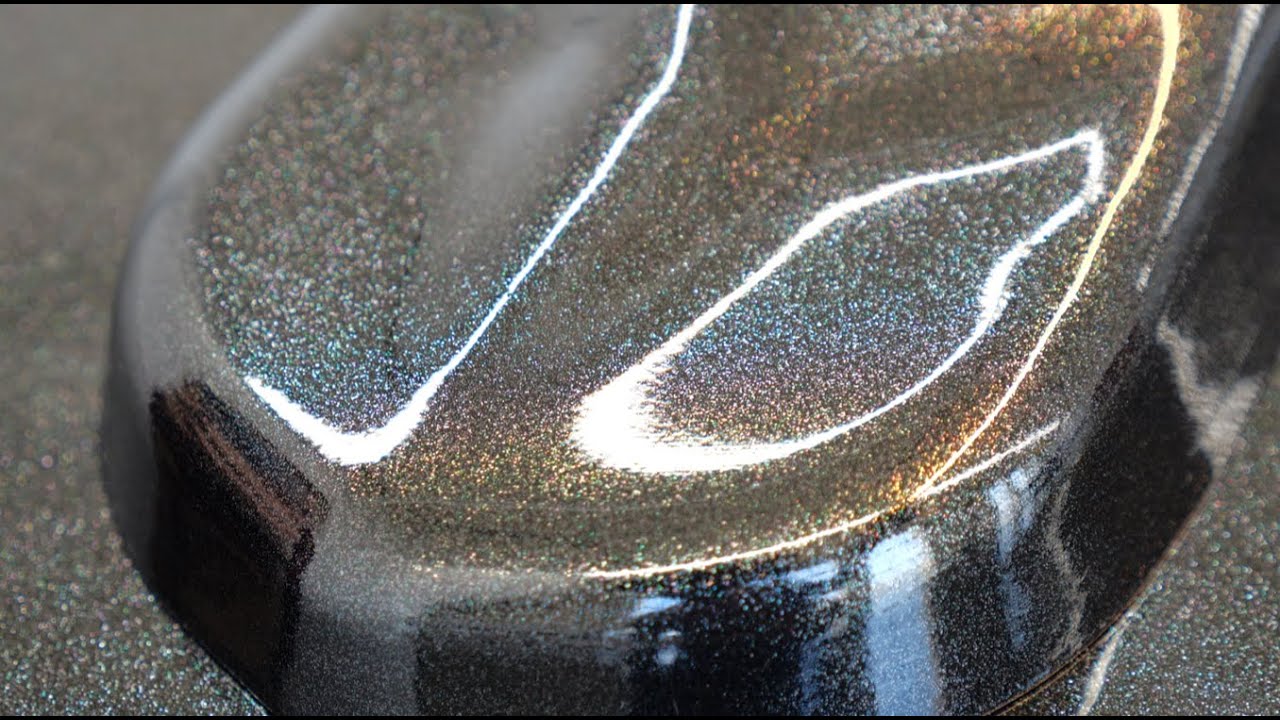
As you apply the wrap, use the squeegee to smooth out air bubbles and wrinkles. Work from the center outward in a consistent motion. If you encounter stubborn bubbles, use a heat gun or hairdryer on a low setting to soften the film, making it easier to adjust.(Satin Vinyl Wraps)
Step 6: Heat and Stretch Around Curves
For curved areas like mirrors or bumpers, apply heat to make the wrap more pliable. Gently stretch and mold the film around these contours while maintaining even pressure with your squeegee. Be careful not to overheat or overstretch, as this can damage the material.
Step 7: Trim Excess Film
Once the wrap is securely in place, use a utility knife or precision blade to trim any excess film along edges and seams. Take your time to ensure clean, precise cuts for a professional finish.
Step 8: Final Inspection and Touch-Ups
Inspect your work for any imperfections. If you notice air bubbles or loose edges, use heat and your squeegee to fix them. Allow the wrap to set for 24-48 hours before washing or exposing your car to extreme conditions.
Conclusion
Installing diamond car wraps can be a rewarding DIY project that elevates your vehicle's style. With patience, attention to detail, and proper tools, you can achieve a stunning finish that turns heads wherever you go. Whether you're enhancing your car for personal enjoyment or preparing it for an event, this guide will help you achieve professional-looking results.